
In summary:
Below are step-by-step instructions, with screenshots.
How to download: Chase Home Depot USAA
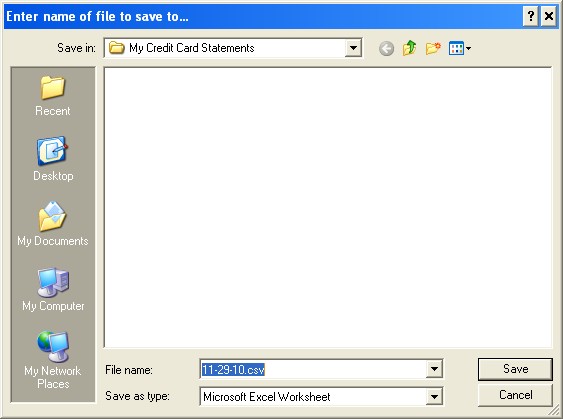
Save the statement file to your computer.
Make note of the folder where you save it. In this example, the file 11-29-10.csv is being saved in the folder My Credit Card Statements:
Browse to the folder where you saved your downloaded statement (e.g. My Credit Card Statements)
Open the statement in Excel (double-click the filename)

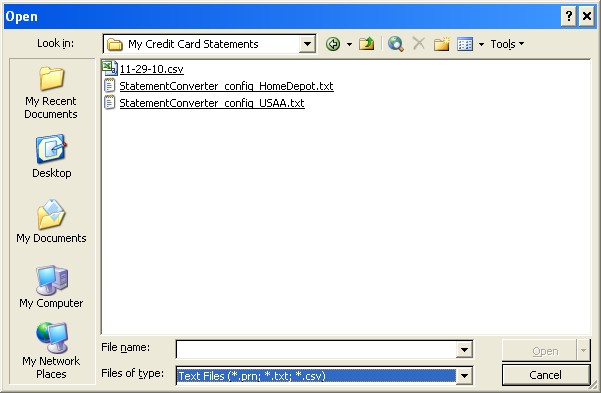
Alternate method: If clicking the file does not automatically start Excel, start Excel and select FILE > OPEN... and then browse to your statements folder. In the dialog box, change the option Files of type: to Text files. Click the .CSV file to select it, then click OPEN, like this:
Excel 2010: If Excel display a warning, "Protected View", click Enable Editing

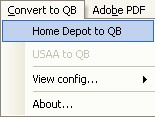
Excel 2003~2007: select Convert to QB
Excel 2010 and later: select Add-Ins and then Convert to QB

Select the converter to use:
Is your menu disabled/grayed-out? See this Help page
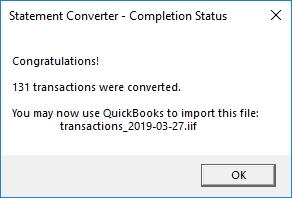
As soon you select the converter, the conversion starts. Within a second or two, the converter will read your statement and create a file ready for you to import into QuickBooks. The completion message looks similar to this:
The last step is to import your data into QuickBooks. This is the fun part!
In summary:
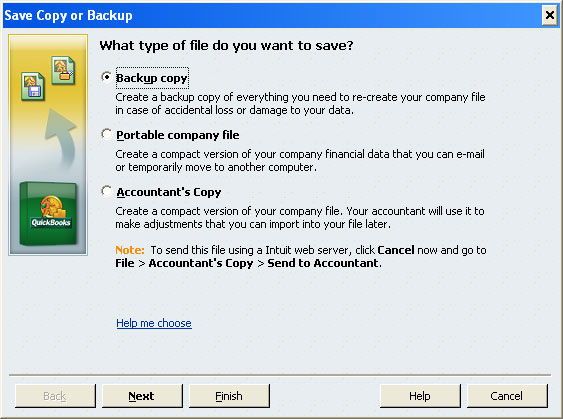
It’s a good idea to backup your company file before importing because QuickBooks cannot "undo" it. With a backup, you can get back to where you were.
Click Finish
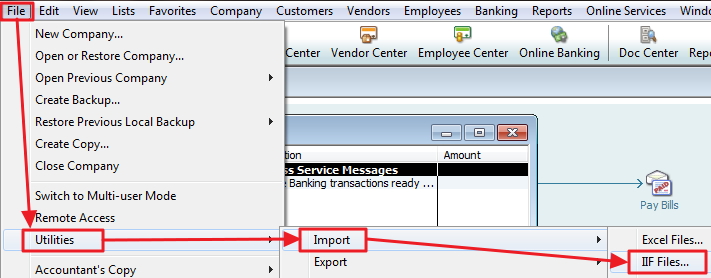
Select File > Utilities > Import > IIF Files...
Browse to the folder where your statement is and select the .IIF file (or, click the file and Open). Your data will immediately be imported and you’ll see this message:
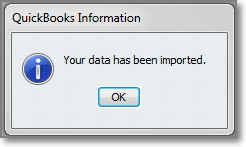
Click OK
After importing successfully, the .IIF file is no longer needed. You may delete it or you might want to move it to another folder so that you do not accidentally import it again (for example, move your imported files to a folder named Has been imported into QB). Note that QuickBooks has no way to know if an .IIF file has already been imported — it will import again and create duplicate entries, if you tell it to.
You’re done! You can use QuickBooks to view the imported transactions, reconcile the account, view reports, etc.