The standard Lookup feature compares each transaction to one value, in column A:

The Two-Part Lookup option can compare transactions to two values for precise matching:

Example:
Deposit to Checking, Account #1234
Deposit to Checking, Account #5678
The Two-Part Lookup option can properly post these transactions to their respective accounts.
Many statements contain the entire transaction description in a single column, such as "Description". The program can examine that one column for two values.
Example::
If the Description contains "Deposit to Checking" and the Description contains "#1234", then assign Vendor name V and post it to account A.
Other statements have multiple columns of description, such as "Payee" and "Memo". The program can examine each column separately.
Example::
If the Payee contains "Deposit to Checking" and the Memo contains "#5678", then assign Vendor name V and post it to account A.
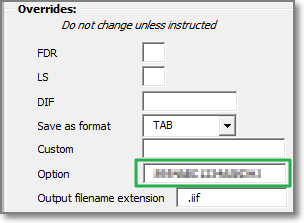
Enter the activation code in Overrides > Option at the bottom right

Copy and paste the following setting into SC_config_System.txt:
# set the two-part lookup option
Lookup_Comparison_Column_2 =
Examples:
You decide to have both lookup comparisons on the Payee. In your statement, Payee data is in column B, so you would enter:
Lookup_Comparison_Column_2 = B
You want lookups to be on the Payee and the Memo. Memos are in column F of your statement, so your setting for the second lookup would be:
Lookup_Comparison_Column_2 = F
Insert a new, empty column B by selecting column B and clicking Insert > Column

Enter your matching rules in columns A and B of the Lookup table

If you enter text in columns A and B, both items have to match.
If you enter text in only one column, A or B, only that one item has to match.
Convert your statement as usual.
If you have any questions, please submit a support ticket.
Complete instructions for the Lookup feature are here.